Archival Information Collections (AICs)
Because datasets and digital object collections can be large and heterogeneous, one dataset or collection of digital objects may be broken into multiple AIPs. In such cases, these AIPs can be intellectually combined into one Archival Information Collection (AIC), defined by the OAIS reference model as “an Archival Information Package whose Content Information is an aggregation of other Archival Information Packages.” (OAIS, 1-9)
When you create an AIC in Archivematica, the individual AIPs are not physically combined; that is, they still exist as separate packages. The AIC itself is also a separate package, containing only metadata - specifically, a specialized METS file that lists all of the AIPs that belong to the AIC.
On this page:
Create an Archival Information Collection
Creating an AIC is a two-step process. First, you must create your AIPs. It’s easiest if you are able to create all of the required AIPs before you create the AIC, but there is information below on how to update an AIC if needed.
The method below adds some metadata about the AIC (an identifier) to each transfer before it becomes an AIP. This is optional, but it can be a helpful way to search for the AIPs that will form the AIC. If you do not use the AIC identifier, you must use some other method by which you can search for the AIPs that will be included in the AIC (i.e. the AIP name). Note that if you do not add an AIC identifier, it may be more difficult to search for the AIC’s component AIPs later.
The second step uses the AIC identifier (or some other search parameter) to connect multiple AIPs into an AIC.
The method described requires users to enter the AIC identifier manually while
processing the transfer; however, it is also possible to add the AIC identifier
using a metadata CSV by adding a column to your CSV with
the heading dcterms.isPartOf.
Step 1: Create your AIPs
- Create a transfer. This transfer can consist of any data and may be created using any transfer type.
- If you’d like, add an AIC identifier to the transfer by clicking on the
transfer’s metadata button. This must be done before
Microservice:
Add final metadata
.
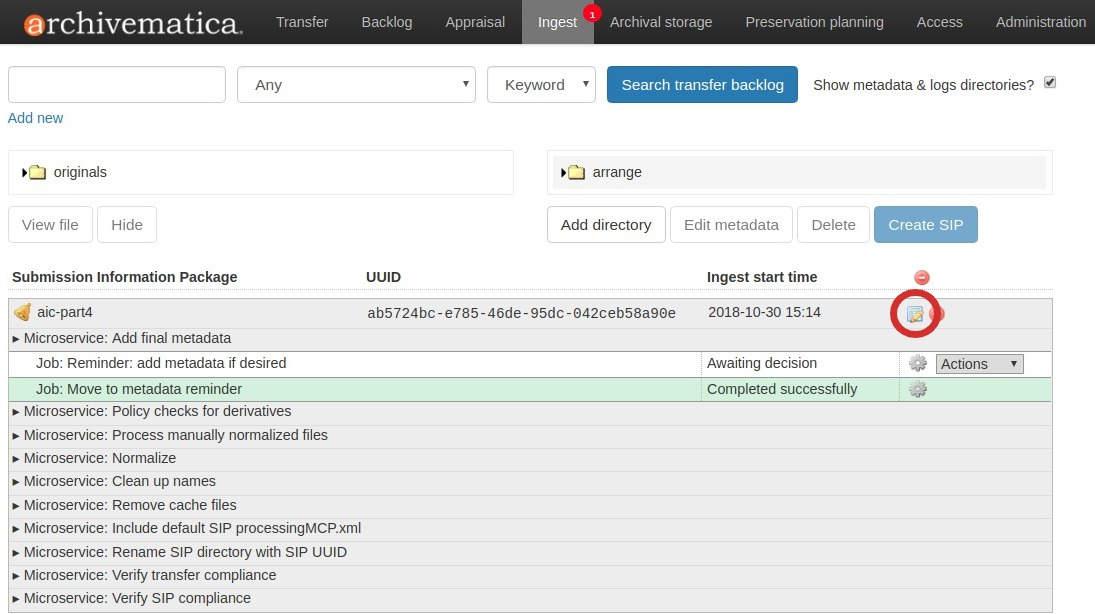
Note
Archivematica can be configured to remind you to add metadata. In your
processing configuration, set the field
Reminder: add metadata if desired to None.
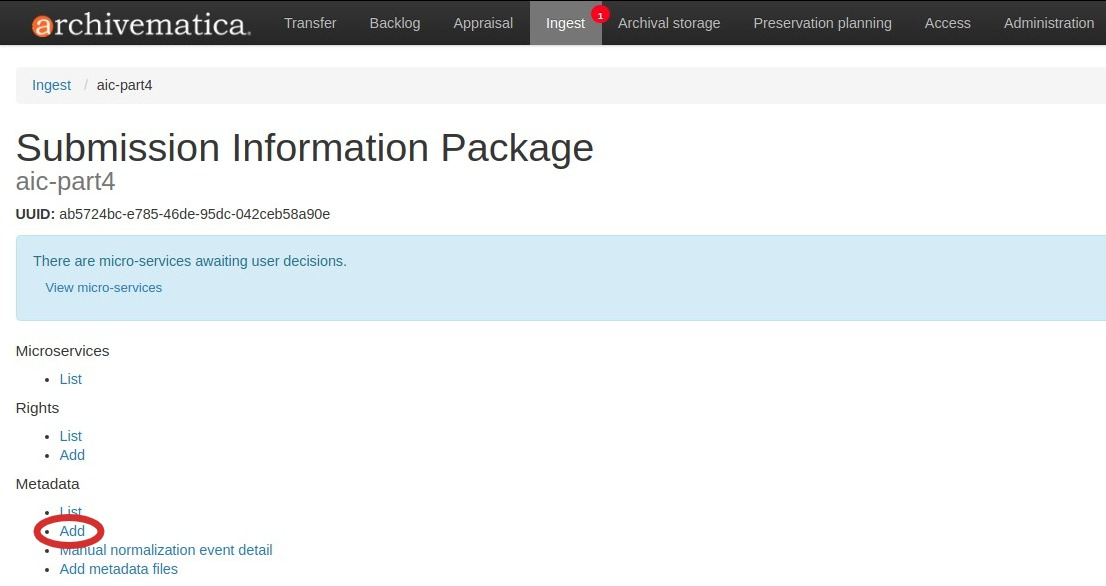
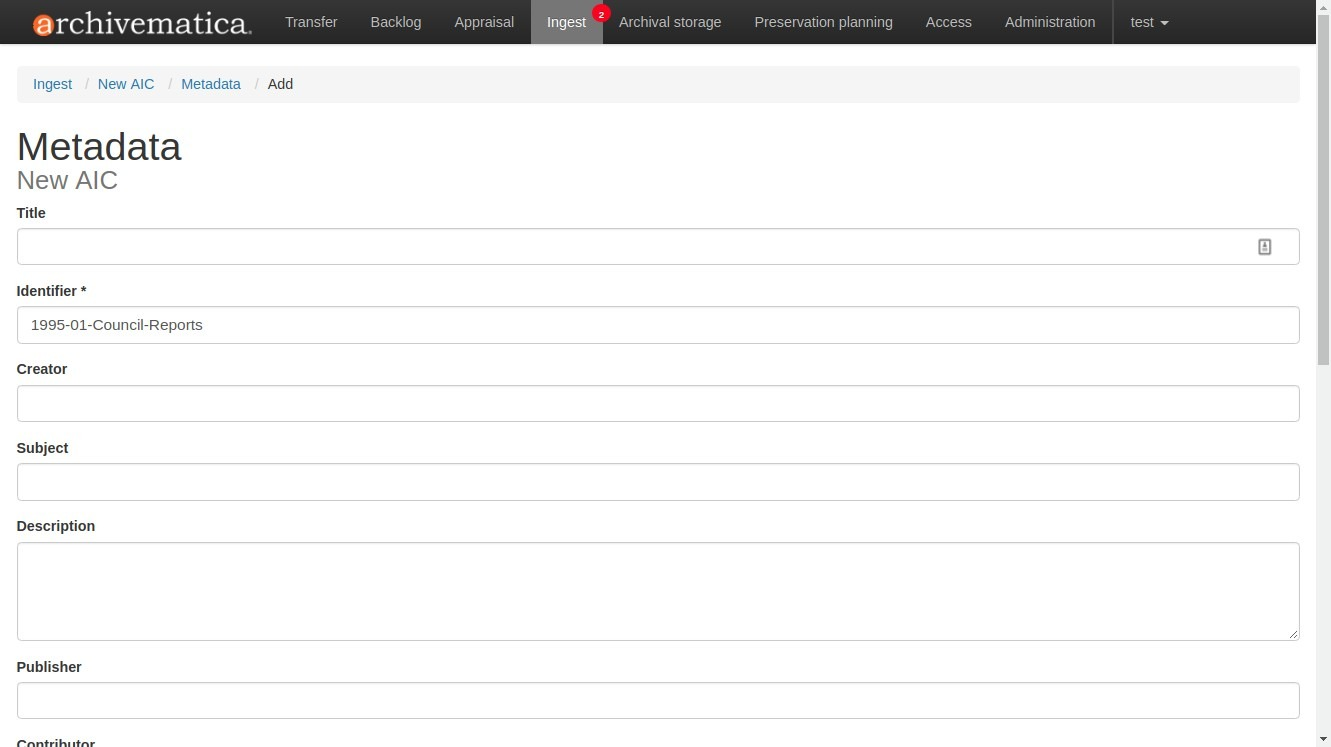
- Clicking on the metadata button should have opened up the transfer’s metadata information screen. Under the Metadata heading, click on Add.
- In the Part of AIC field, enter the AIC identifier. You can also add other descriptive metadata for the transfer, if you wish.
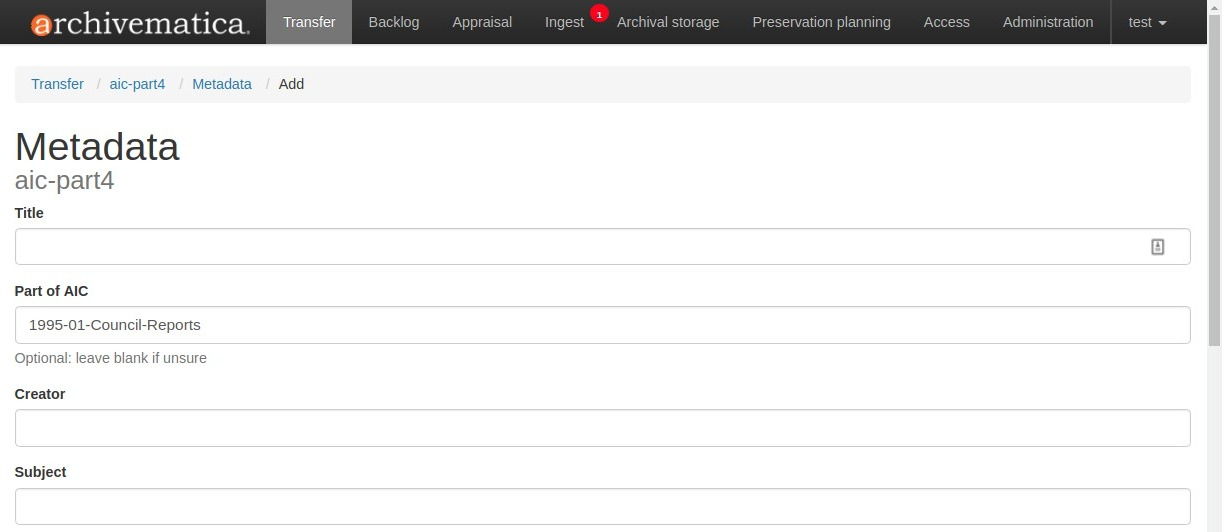
Tip
The AIC identifier can be any combination of letters and numbers.
- At bottom of screen, click Create.
- Finish processing your AIP and place it in storage.
Repeat steps 1 through 6 to create as many AIPs as you need. If you plan to use the AIC identifier to connect your AIPs, make sure to enter the same number in the Part of AIC field. Once you’ve created all your AIPs, move on to Step 2 and create the AIC.
Step 2: Create the AIC
- Once all your AIPs have been stored, click on the Archival Storage tab.
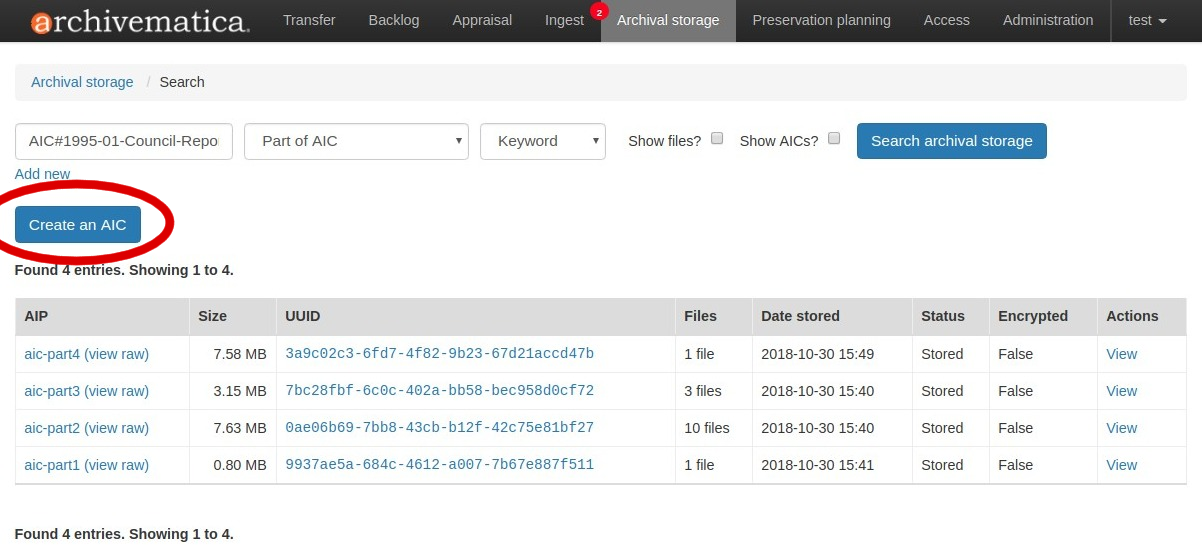
- Search for the AIPs that will be included in the AIC. This is where the AIC
identifier is helpful. To retrieve all AIPs with the same value in Part of
AIC, enter
AIC#[identifier]in the search box, replacing[identifier]with the identifier you entered. SelectPart of AICas the search parameter.

- When you’re satisfied that only the AIPs that you want to include in the AIC are included in the search results, click Create an AIC.
- You will see a metadata entry template for the AIC. At a minimum, you must give the AIC an identifier. Archivematica will use the identifier as the name of the AIC package that it is about to generate. You can also add more metadata about the AIC using this form, if you wish. When you’re done, click on Create at the bottom of the metadata entry template.
- Navigate to the Ingest tab. The AIC will appear as a new ingest. Approve it.
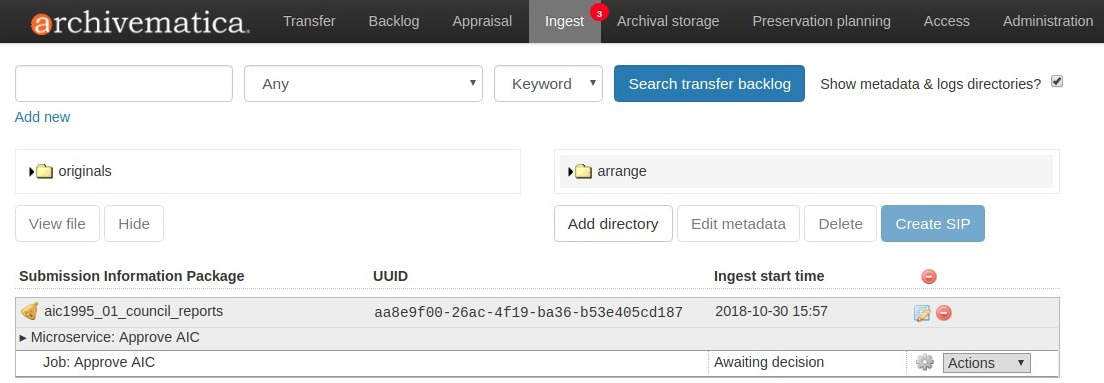
- Continue processing the AIC and place it in archival storage.
Search for AICs
If you need to retrieve the AIC or any of the AIPs that make up the AIC, you can do so on the Archival Storage tab.
To see AIC information while browsing the Archival Storage tab, check the
Show AICs? button next to the search button. Search results will now include
the column AIC, which provides information about whether or not the AIP
is included in an AIC (or if it is, itself, an AIC).
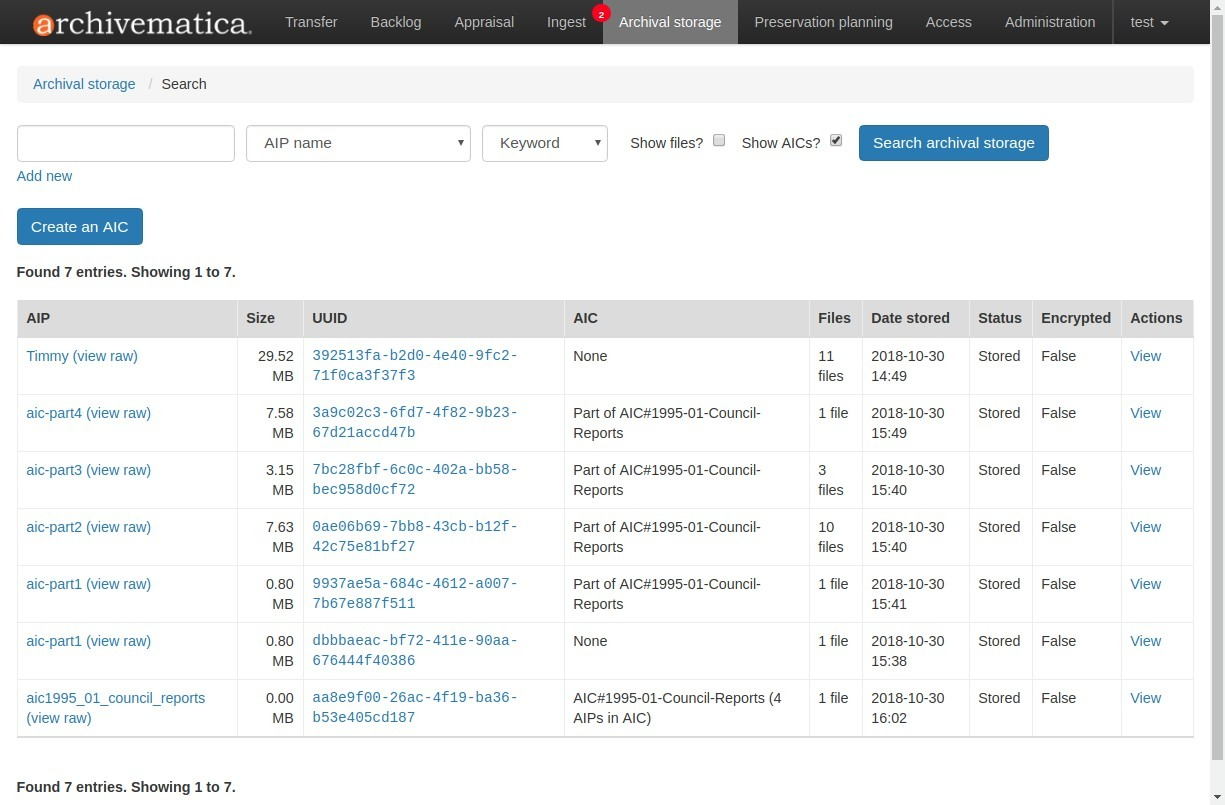
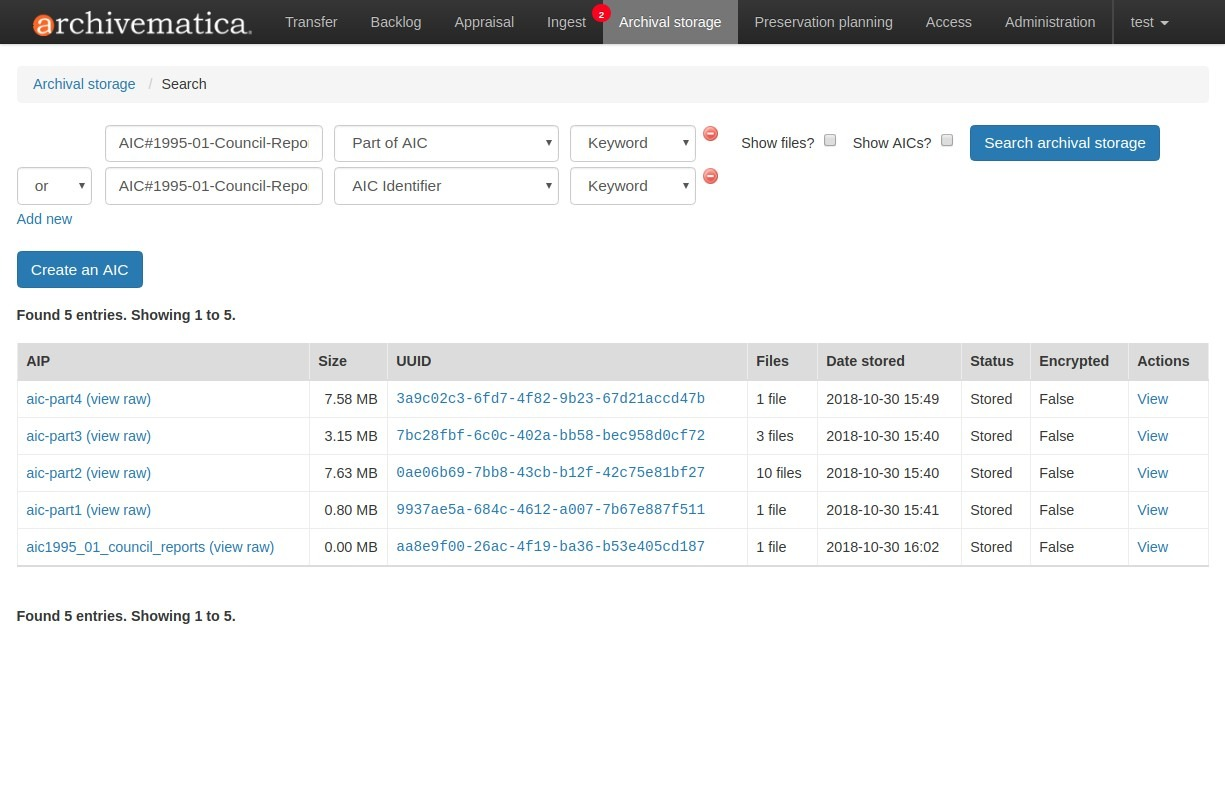
In the above screenshot, note that four of the AIPs are part of an AIC while the last result is the AIC itself. This was a wildcard search, displaying everything currently in Archival Storage.
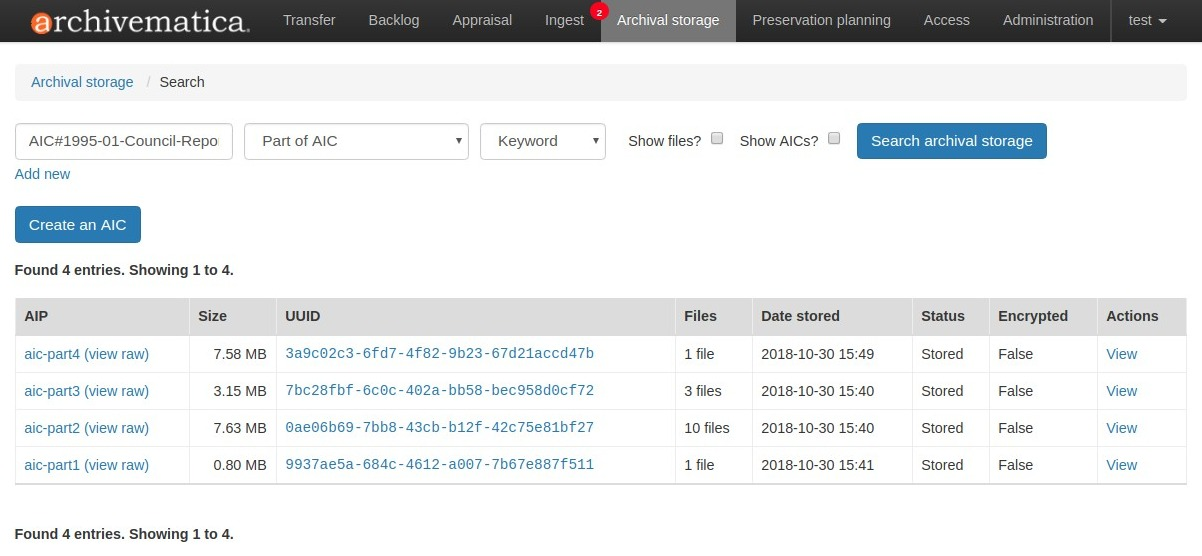
To search for the AIPs that belong to a specific AIC, enter AIC#[identifier]
in the search box, replacing [identifier] with the identifier that you
entered while creating the AIPs (see Step 1, above). Select
Part of AIC as the search parameter.
Note
If you did not create your AIC by adding the AIC identifier to each AIP, as described in Step 1 above, it may be more difficult to find the AIC’s component AIPs. You may need to download the AIC package and review the METS file contained within to see which AIPs make up the AIC.
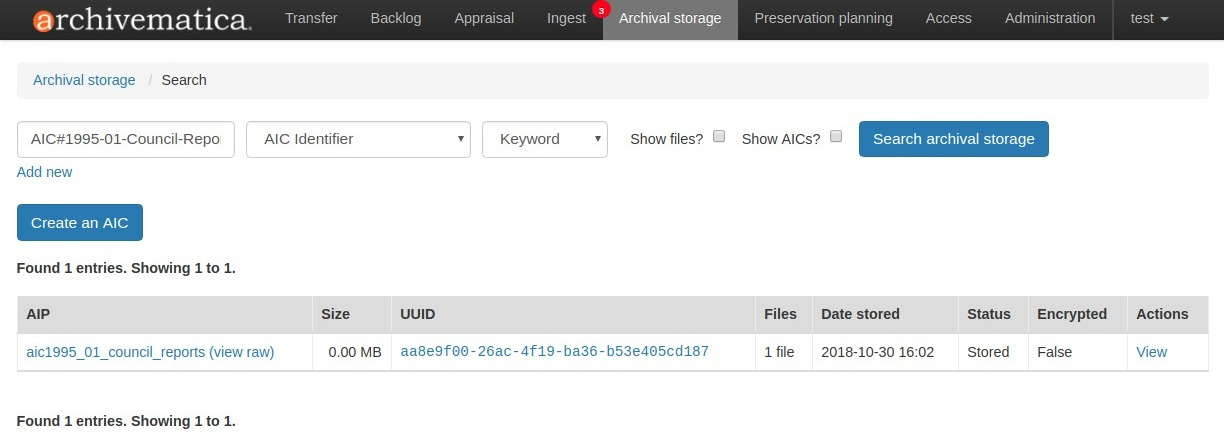
You can search for a specific AIC by using the AIC identifier. Enter
AIC#[identifier] in the search box, replacing [identifier] with the
identifier for your AIC. Select AIC identifier as the search parameter.
If you want to see both the AIC and the AIPs that belong to it, you can perform a Boolean search.
- Search for the AIPs by entering
AIC#[identifier]in the search box, replacing[identifier]with the identifier that you entered while creating the AIPs. SelectPart of AICas the search parameter. - Click Add new below the search box to add a second search query
- Change the boolean operator to
OR. - In the second query line, enter
AIC#[identifier]in the search box, replacing[identifier]with the identifier for your AIC. SelectAIC identifieras the search parameter.
Update an AIC
The most common reason to update an AIC is to add more AIPs to it. To do this, the original AIC must be deleted and a new AIC created.
An AIC is deleted the same way that an AIP is deleted. For more information on deleting an AIP, see Delete an AIP.
To create a new AIC, follow the instructions to create an AIC above.
AIC contents
An AIC is a package, similar to an AIP, but it contains metadata only. A basic AIC will have a structure similar to this:
my_aic-ea0f2429-7d9f-49df-8e5a-2e6db0fb5fce/
  ├── bag-info.txt
  ├── bagit.txt
  ├── data
  │   ├── metadata
  │   │   └── METS.7a3a0b11-fbdd-484d-a58c-7d66273c3f23.xml
  │   └── METS.ea0f2429-7d9f-49df-8e5a-2e6db0fb5fce.xml
  ├── manifest-sha256.txt
  └── tagmanifest-md5.txt
Like AIPs, AICs are bagged according to the BagIt specification. To learn more about how Archivematica implements BagIt, see AIP structure.
There are two METS files included in the AIC. The first one, in the data
subdirectory, is the METS file for the AIC package itself, similar to an AIP
METS file.
The second METS file, located within data/metadata, contains information
about the AIC and its component AIPs. The AIC’s descriptive metadata section
(dmdSec) includes the Dublin Core added during AIC creation.
<mets:dmdSec ID="dmdSec_1">
  <mets:mdWrap MDTYPE="DC">
    <mets:xmlData>
      <dcterms:dublincore xmlns:dc="http://purl.org/dc/elements/1.1/" xmlns:dcterms="http://purl.org/dc/terms/" xsi:schemaLocation="http://purl.org/dc/terms/ http://dublincore.org/schemas/xmls/qdc/2008/02/11/dcterms.xsd">
        <dc:title>My AIC</dc:title>
        <dc:type>Archival Information Collection</dc:type>
        <dc:identifier>AIC#1995-01-Council-Reports</dc:identifier>
        <dcterms:extent>3 AIPs</dcterms:extent>
      </dcterms:dublincore>
    </mets:xmlData>
  </mets:mdWrap>
</mets:dmdSec>
The METS file also shows which AIPs are included in this AIC. The AIC’s component AIPs are listed in the METS file’s fileSec.
<mets:fileSec>
  <mets:fileGrp>
    <mets:file ID="aic-part2-d6fcffe4-5eef-4ae8-a0b8-b848ed7d7851"/>
    <mets:file ID="aic-part1-b7de7bb6-e263-4a6f-8ae6-d0c9bff04365"/>
    <mets:file ID="aic-part3-16f43cd7-4b2d-4a32-bee3-138adade4399"/>
  </mets:fileGrp>
</mets:fileSec>
This information is also displayed in the logical structMap of the METS. The logical structMap is a hierarchical display of the AIC, intended to show the relationship between the items being described (i.e. that the component AIPs are part of this AIC).
<mets:structMap TYPE="logical">
  <mets:div TYPE="Archival Information Collection" DMDID="dmdSec_1">
    <mets:div LABEL="aic-part2">
      <mets:fptr FILEID="aic-part2-d6fcffe4-5eef-4ae8-a0b8-b848ed7d7851"/>
    </mets:div>
    <mets:div LABEL="aic-part1">
      <mets:fptr FILEID="aic-part1-b7de7bb6-e263-4a6f-8ae6-d0c9bff04365"/>
    </mets:div>
    <mets:div LABEL="aic-part3">
      <mets:fptr FILEID="aic-part3-16f43cd7-4b2d-4a32-bee3-138adade4399"/>
    </mets:div>
  </mets:div>
</mets:structMap>
Archivematica 1.8.1
Contents
Search
Open the general index or type your search in the search box.
Available projects
Archivematica
- Version 1.18.0 (stable-current)
- Version 1.17.1 (stable-previous)
- Version 1.16.0 (legacy)
- Version 1.15.1 (legacy)
- Version 1.14.1 (legacy)
- Version 1.13.2 (legacy)
- Version 1.12.2 (legacy)
- Version 1.11.2 (legacy)
- Version 1.10.2 (legacy)
- Version 1.9.3 (legacy)
- Version 1.8.1 (legacy)
- Version 1.7.2 (legacy)
- Version 1.6.1 (legacy)
- Version 1.5 (legacy)
- Version 1.4 (legacy)
Archivematica Storage Service
- Version 0.24.0 (stable-current)
- Version 0.23.0 (stable-previous)
- Version 0.22.0 (legacy)
- Version 0.21.1 (legacy)
- Version 0.20.1 (legacy)
- Version 0.19.0 (legacy)
- Version 0.18.1 (legacy)
- Version 0.17.1 (legacy)
- Version 0.16.1 (legacy)
- Version 0.15.1 (legacy)
- Version 0.14.1 (legacy)
- Version 0.13.0 (legacy)
- Version 0.12.0 (legacy)
- Version 0.11.1 (legacy)
- Version 0.10 (legacy)
- Version 0.9 (legacy)
- Version 0.8 (legacy)
License
Archivematica documentation by Artefactual Systems Inc. is licensed under a Creative Commons Attribution-ShareAlike 4.0 International License.
