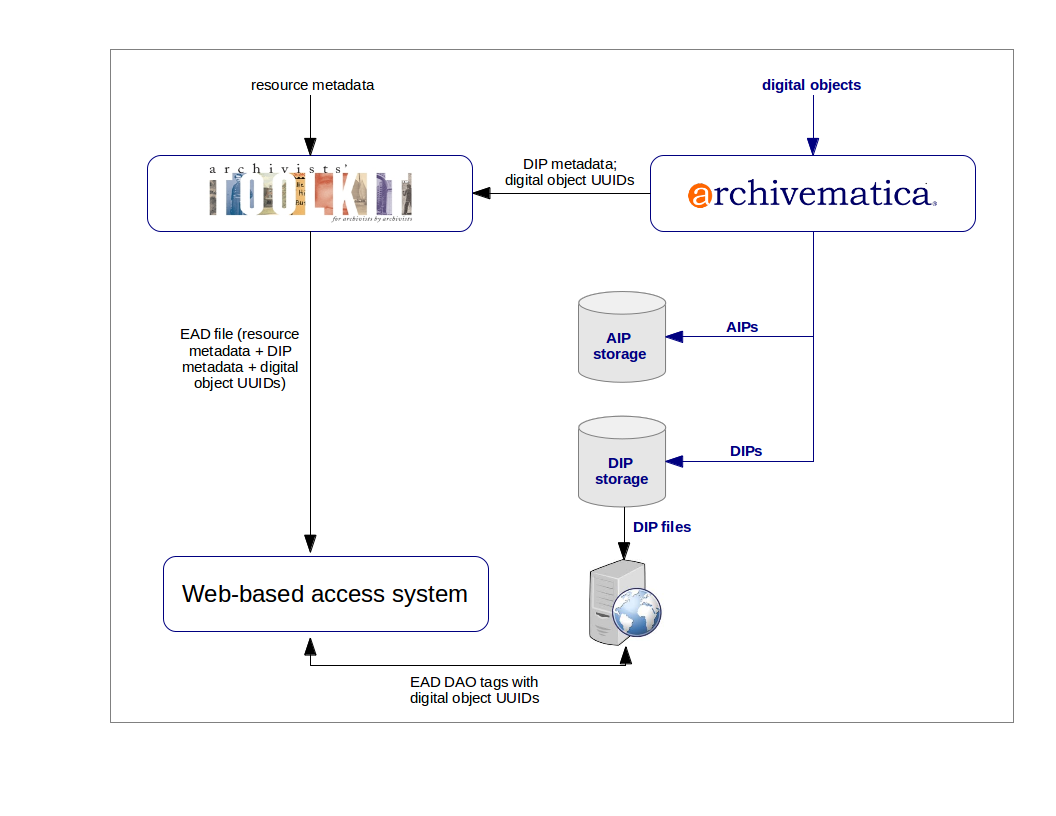
Upload DIP metadata to Archivists’ Toolkit
This workflow involves:
- creating resource components in Archivists’ Toolkit (AT);
- preserving digital objects and generating access copies (as DIPs) in Archivematica;
- sending DIP metadata, including digital object UUIDs, to AT;
- copying access copies to a web-server;
- and generating EAD files from AT and uploading them to a web-based access system.
On this page:
The diagram below depicts the overall workflow:
Administrative settings
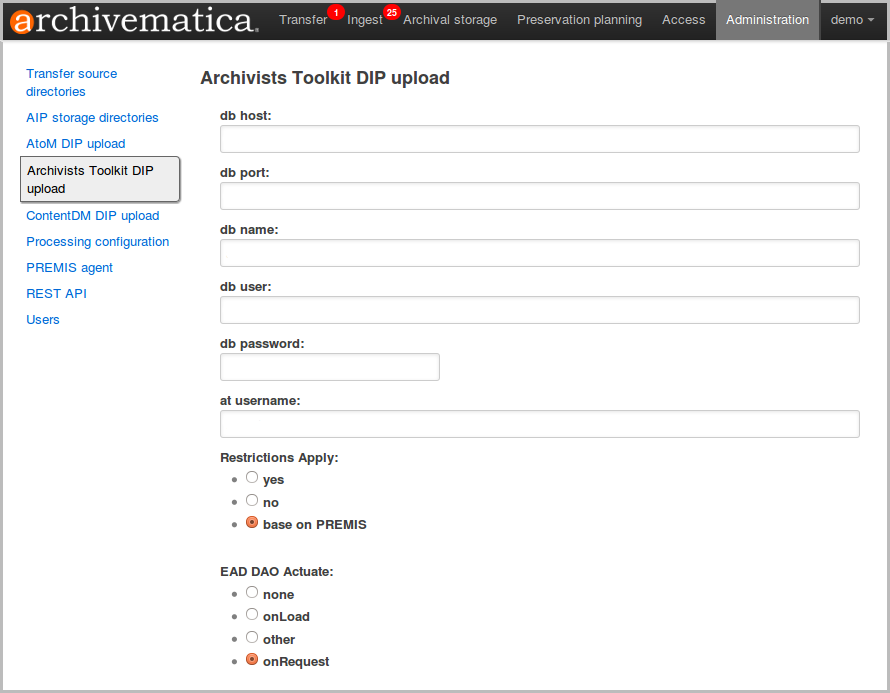
Before ingesting digital objects destined for Archivists’ Toolkit, ensure that the Achivists’ Toolkit DIP upload settings in the administration tab of the dashboard have been set.
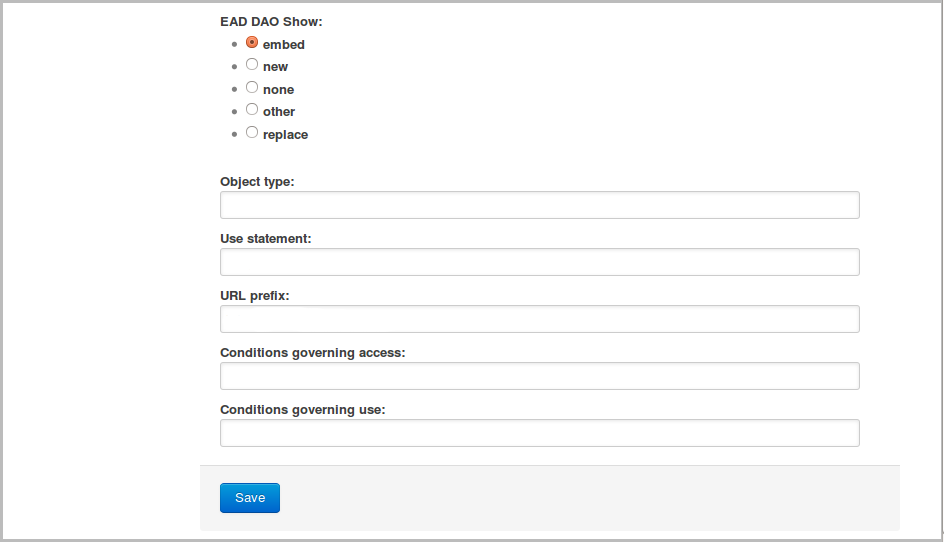
- These settings should be created and saved before digital objects destined for upload to Archivists Toolkit are processed. Note that these can be set once and used for processing any number of transfers (i.e. they do not need to be re-set for each transfer). The screenshots below show the template in the dashboard.
- Include the IP address of the host database (db host), the database port (db port), the database name (db name), the database user (db user), and the Archivists’ Toolkit user name (at username).
- Should you wish to enable the PREMIS-based restrictions functionality, choose “base on PREMIS” under “Restrictions Apply”. To add PREMIS rights, please see Add PREMIS rights and restrictions, below.
Mapping Archivematica DIP objects to Archivists’ Toolkit resource components
At the DIP upload microservice in the Archivematica dashboard, the user can choose to upload the DIP to AT. Archivematica then loads a screen listing all AT collections. The user navigates to a specific collection either by searching for it or by navigating to it using the screen pager. To start mapping files in the DIP to resource components in a given collection, the user clicks the “Assign objects” button to the right of the collection title. To drill down to lower levels of the collection, the user clicks on the collection title.
This opens the DIP object pairing screen which lists the objects in the DIP and Resources in AT to which the objects can be linked:
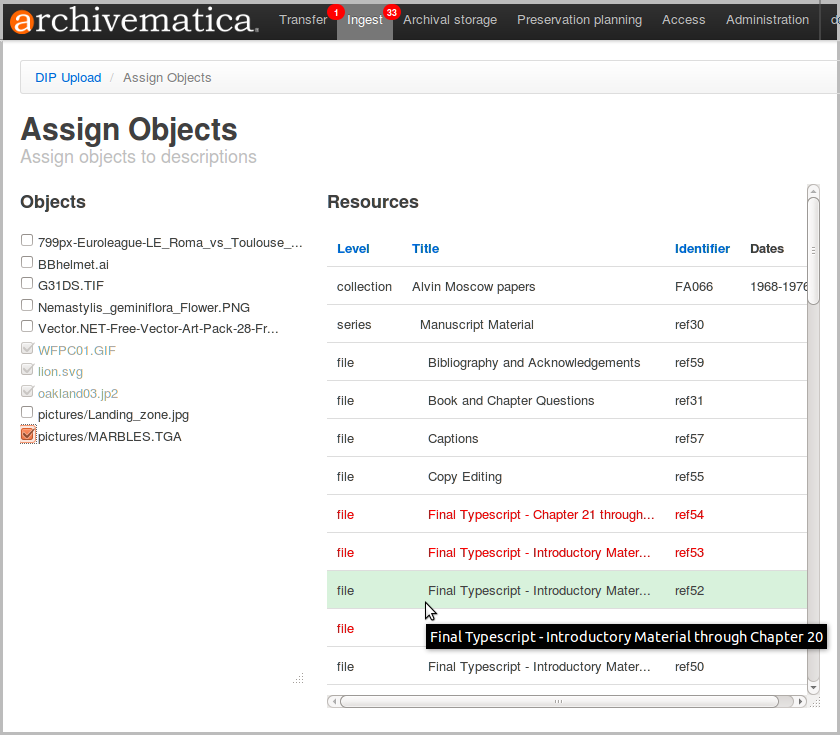
The user selects one or more objects, then clicks on the appropriate resource. This action highlights the resource; to pair the objects with their resources, click on the “Pair” button on the top right of the screen or press Enter on your keyboard:
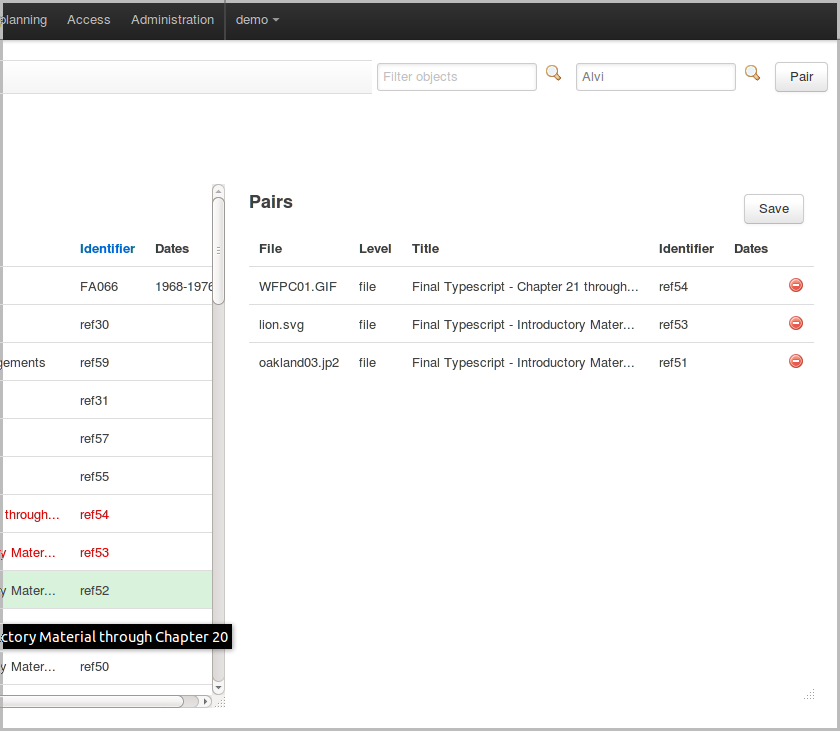
Note that an object that has already been paired with a resource is greyed out and cannot be selected again, while a resource that has already been paired with an object changes font colour from black to red, but can still have more objects paired with it.
Above, shown are pairs that have been created using this process. To delete a pair (i.e. make the digital object available to be linked to a different description), click the delete icon to the right of the pair. Once the mapping is completed, click “Save”. You will be asked to confirm the save, and then the mapping screen will close and you will be returned to the ingest tab in the Archivematica dashboard.
Workflow
Create resource components in Archivists’ Toolkit
Create a collection-level resource component and sub-components as desired. Note that “level of description” of the top-level component must be “collection”.
Prepare transfers for ingest
Digital objects can be ingested in zipped or unzipped bags or in unbagged
directories as standard transfers. If the objects are in a bag, do not insert
a directory between the top-level directory and the bag’s /data directory.
Thus:
/bag
    /data
       file1.tif
       file2.tif
       file3.tif
Not:
/bag
    /directory
        /data
            file1.tif
            file2.tif
            file3.tif
The directory structure above assumes that Archivematica will be generating access copies during processing (i.e. user selects “Normalize for access” or “Normalize for preservation and access” at the normalization step). If you wish to include access derivatives in the transfer instead, the derivatives must be placed in an /access directory, and must have the same filename as the original so that Archivematica can recognize the link between the two.
Thus:
file1.tif
file2.tif
file3.tif
/access
   file2.jp2
   file3.jp2
For transfers with multiple images which are combined into multi-page access copies, the directory structure should look like this:
file1.tif
file2.tif
file3.tif
multi.pdf
   /access
       multi.pdf
Note that this structure can also accommodate directory hierarchies:
/access
    /JPG_PDF
        /GDH001_026_008800
            GDH001_027_008800.pdf
        /GDH001_027_00577
            GDH001_025_00577.pdf
    /JPG_PDF
        /GDH001_024_008800
            GDH001_024_008800_001_se.jpg
            GDH001_024_008800_002_se.jpg
        /GDH001_025_00577
            GDH001_02500577001_se.jpg
    /tiffs
        /GDH001_024_008800
            GDH001_024_008800_001_m.tiff
            GDH001_024_008800_002_m.tiff
        /GDH001_025_00577
            GDH001_02500577001_m.tiff
When processing transfers containing access derivatives, select either “Normalize for preservation” or “No normalization” at the normalization step.
Process transfers in Archivematica and send DIP metadata to Archivists Toolkit
Process the transfer and create a DIP, either by placing access derivatives in
an /access directory in the transfer, or by selecting “Normalize for
access” at the normalization step during the Archivematica ingest workflow
(see Prepare transfers for ingest, above). At the “Upload DIP” step, select
“Upload to Archivists’ Toolkit”. See Administrative settings,
above for information on administration tab settings for Archivists’
Toolkit and for using the digital object matching GUI to match DIP objects to
Archivists’ Toolkit resource components.
Add PREMIS rights and restrictions
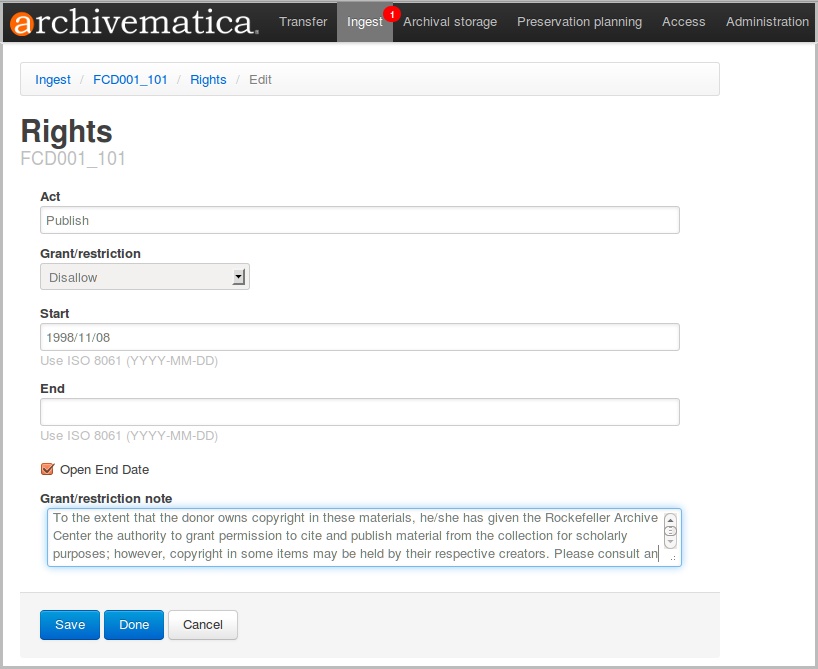
Prior to normalization, the user can enter PREMIS rights information which can be used to populate some fields in the AT database. Information about Archivematica’s PREMIS rights module is available at PREMIS metadata: rights .
This feature focuses on two acts to affect the AT DIP metadata (Disseminate and Publish), and three different types of restrictions (Allow, Disallow and Conditional). For Disseminate, the choices made affect whether the digital object can be viewed by the public in the web-based access system. For Publish, the only effect is that the PREMIS rightsGrantedNote is used to populate the ConditionsGoverningUse field in the AT database. Below are summaries of the logic applied to the information entered into the PREMIS rights module.
Act: Disseminate
If PREMIS <act> = Disseminate and PREMIS <restriction> = Allow:
- restrictionsApply = FALSE (the public will be able to view the object in the web-based access system)
If PREMIS <act> = Disseminate and PREMIS <restriction> = Conditional:
- restrictionsApply = TRUE (the public will not be able to view the object in the web-based access system)
If PREMIS <act> = Disseminate and PREMIS <restriction> = Disallow:
- restrictionsApply = TRUE (the public will not be able to view the object in the web-based access system)
If PREMIS <act> = Disseminate, populate AT ConditionsGoverningAccess with contents of PREMIS rightsGrantedNote
When restrictionsApply=TRUE, both eadDaoActuate and eadDaoShow will be set to “none.”
Act: Publish
If PREMIS <act> = Publish, populate AT ConditionsGoverningUse with contents of PREMIS rightsGrantedNote:
Archivematica 1.8.1
Contents
Search
Open the general index or type your search in the search box.
Available projects
Archivematica
- Version 1.18.0 (stable-current)
- Version 1.17.1 (stable-previous)
- Version 1.16.0 (legacy)
- Version 1.15.1 (legacy)
- Version 1.14.1 (legacy)
- Version 1.13.2 (legacy)
- Version 1.12.2 (legacy)
- Version 1.11.2 (legacy)
- Version 1.10.2 (legacy)
- Version 1.9.3 (legacy)
- Version 1.8.1 (legacy)
- Version 1.7.2 (legacy)
- Version 1.6.1 (legacy)
- Version 1.5 (legacy)
- Version 1.4 (legacy)
Archivematica Storage Service
- Version 0.24.0 (stable-current)
- Version 0.23.0 (stable-previous)
- Version 0.22.0 (legacy)
- Version 0.21.1 (legacy)
- Version 0.20.1 (legacy)
- Version 0.19.0 (legacy)
- Version 0.18.1 (legacy)
- Version 0.17.1 (legacy)
- Version 0.16.1 (legacy)
- Version 0.15.1 (legacy)
- Version 0.14.1 (legacy)
- Version 0.13.0 (legacy)
- Version 0.12.0 (legacy)
- Version 0.11.1 (legacy)
- Version 0.10 (legacy)
- Version 0.9 (legacy)
- Version 0.8 (legacy)
License
Archivematica documentation by Artefactual Systems Inc. is licensed under a Creative Commons Attribution-ShareAlike 4.0 International License.
