Transfer
In Archivematica, Transfer is the process of transforming any set of digital objects and/or directories into a SIP. Transformation may include appraisal, arrangement, description and identification of donor restricted, private or confidential contents. The Transfer tab prepares your content for preservation in Archivematica.
In the Transfer tab of the Dashboard, the user moves digital objects from source directories accessible via the Storage Service into Archivematica. See Administrator manual - Storage Service for instructions on how to set up shared transfer source directories. Once uploaded to the dashboard, transfers run through a number of micro-services, ‘ including: UUID assignment; checksum verification (if checksums are present); package extraction (i.e. unzipping of zipped or otherwise packaged files); virus checking; indexing; format identification and validation; and metadata extraction.
At the end of transfer, the user creates a SIP from one transfer, or chooses to send the transfer to backlog, where it can be divided into different SIPs, or combined into one SIP with other transfers.
On this page:
- Create a transfer
- Process the transfer
- Create a transfer with submission documentation
- Create a transfer with existing checksums
- Format identification
- Extract packages
See also
If you would like to import lower-level metadata with your transfer (i.e. metadata to be attached to subdirectories and files within a SIP), see Metadata import.
If your transfer is a DSpace export, please see DSpace export.
If your transfer is a bag or a zipped bag, please see Bags.
If your transfer is composed of objects that are the result of digitization, please see Digitization output.
If your transfer is composed of digital forensic disk images, please see Forensic image processing.
If you would like to skip some of the default choices for dashboard decision points or make preconfigured choices for your desired workflow, see Processing configuration.
Create a transfer
1. In transfer tab, select your transfer type in the dropdown menu. Types include standard, unzipped bag, zipped bag, DSpace, maildir and Disk image. A standard transfer refers to objects which are contained in a directory. The directory may have sub-directories, and the original placement of the directories and files within will be preserved.
2. In transfer tab, name your transfer and browse to a source directory to select your object or set of objects for upload. Repeat this step to continue adding directories if you wish; each directory chosen will be its own transfer with the same name you gave it above, with a sequential numeric value added. Archivematica will display the number of objects in each available transfer directory.
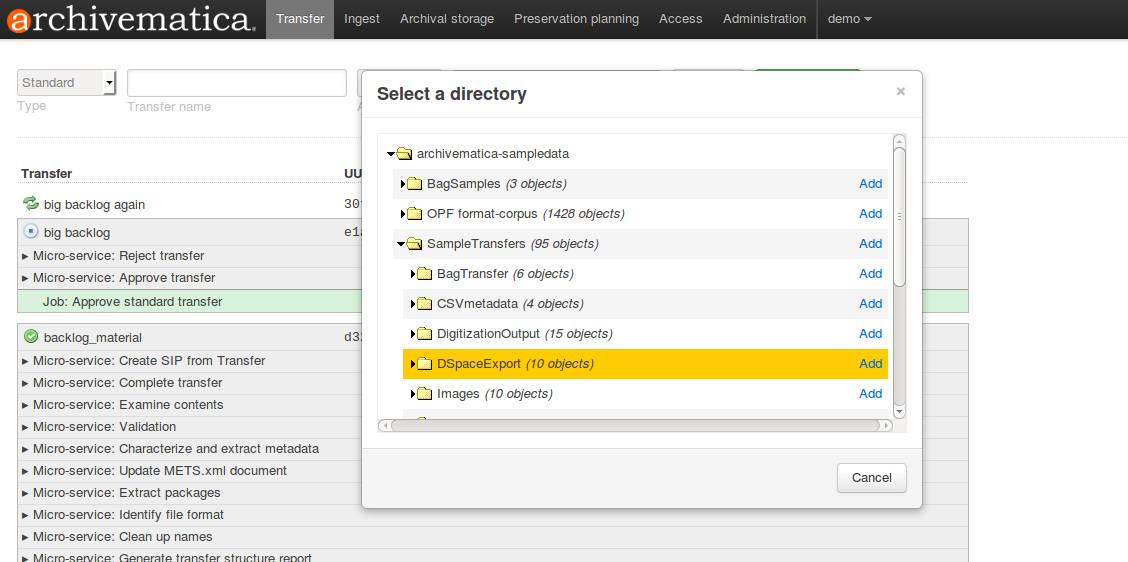
Select transfer for transfers from source directories
- If applicable, enter an accession number for the transfer.
Tip
Adding an accession number may help you find your transfer in backlog later.
4. Once all of your digital object sources have been staged, hit the Start Transfer button for the transfer processing to begin.
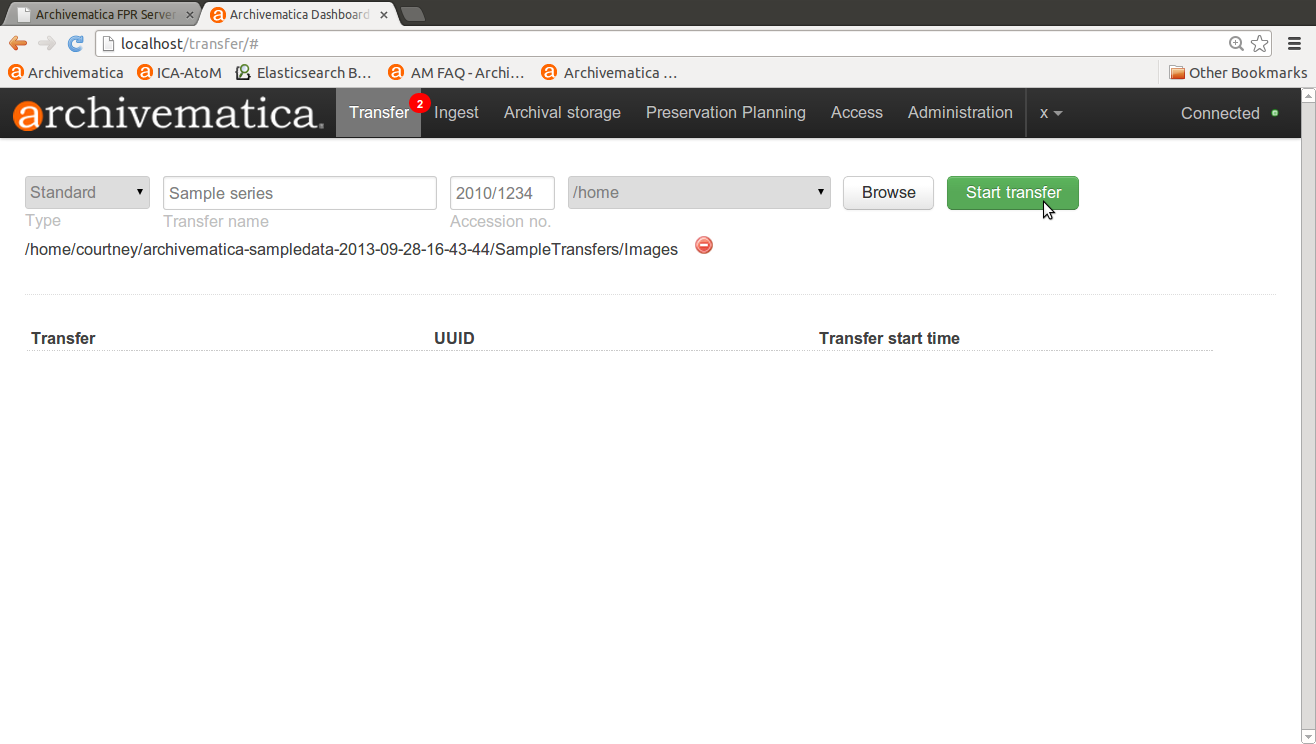
Start transfer
Process the transfer
1. In the dashboard transfer tab, the transfer will appear in the dashboard with a bell icon next to it. This means that it is awaiting a decision by the user.
2. In the Actions drop-down menu, select “Approve transfer” to begin processing the transfer. You may also “Reject transfer” and quit processing.
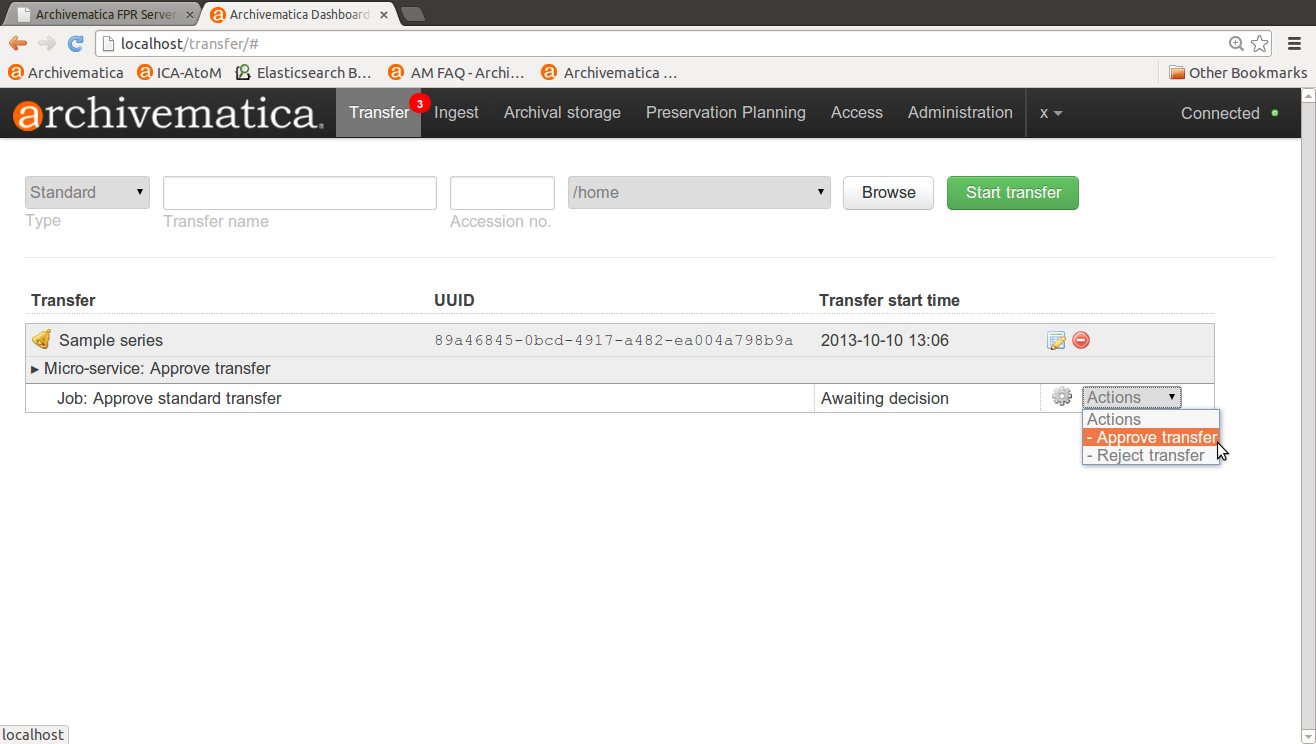
In the Actions drop-down menu, select “Approve transfer”
- The transfer will now run through a series of micro-services. These include:
- Verify transfer compliance (verifies that the transfer is properly structured - i.e. with the logs, metadata and objects folders)
- Rename with transfer UUID (assigns a unique universal identifier for the transfer as a whole; directly associates the transfer with its metadata)
- Assign file UUIDs and checksums to objects (assigns a unique universal identifier and sha-256 checksum to each file in the /objects directory)
- Verify transfer checksums (verifies any checksums included with the transfer in its metadata directory).
- Generate METS.xml document (creates a METS file capturing the original order of the transfer. This METS file is added to any SIPs generated from this transfer)
- Quarantine (quarantines the transfer to a set duration based on preconfiguration settings in the Administration tab of the dashboard; to allow virus definitions to update before a virus scan)
- Scan for viruses (scans for viruses and malware)
- Generate transfer structure report (generates a directory tree of the original transfer and places as a text file in the AIP).
- Clean up file and directory names (removes prohibited characters from folder and filenames, such as ampersands).
- Identify file format (this is the identification that normalization will be based upon, the user can choose between FIDO and extension or skipping format identification at this stage) See Format identification below for more information.
- Extract packages (extracts contents from zipped or otherwise packaged files): You can change your preconfigured workflow settings to allow for some choices about package extraction. See below for details Extract packages
- Characterize and extract metadata (identifies and validates file formats; extracts technical metadata embedded in the files). If you have preconfigured it to do so, Archivematica will stop during this micro-service and allow the user to choose a file identification command from a dropdown menu. To learn about preconfigured options, please see Administrator manual - Processing configuration. Archivematica’s file identification default is set to identification by file extension. You can also choose to skip identification and run it later, during Ingest, instead.
- Complete transfer (Includes indexing transfer)
4. A transfer that is in the middle of processing will show which micro- services have been completed (green) and which are in progress (orange).
5. When a micro-service fails or encounters an error, the micro-service background turns from green to pink and a “failed” icon appears next to the transfer or SIP name. See Error handling for more information about how to handle an error.
6. Once the transfer micro-services are completed, a bell icon will appear next to the transfer. This means that the transfer is ready to be packaged into a SIP for ingest or sent to a backlog, indexed and stored to be retrieved for processing at a later date
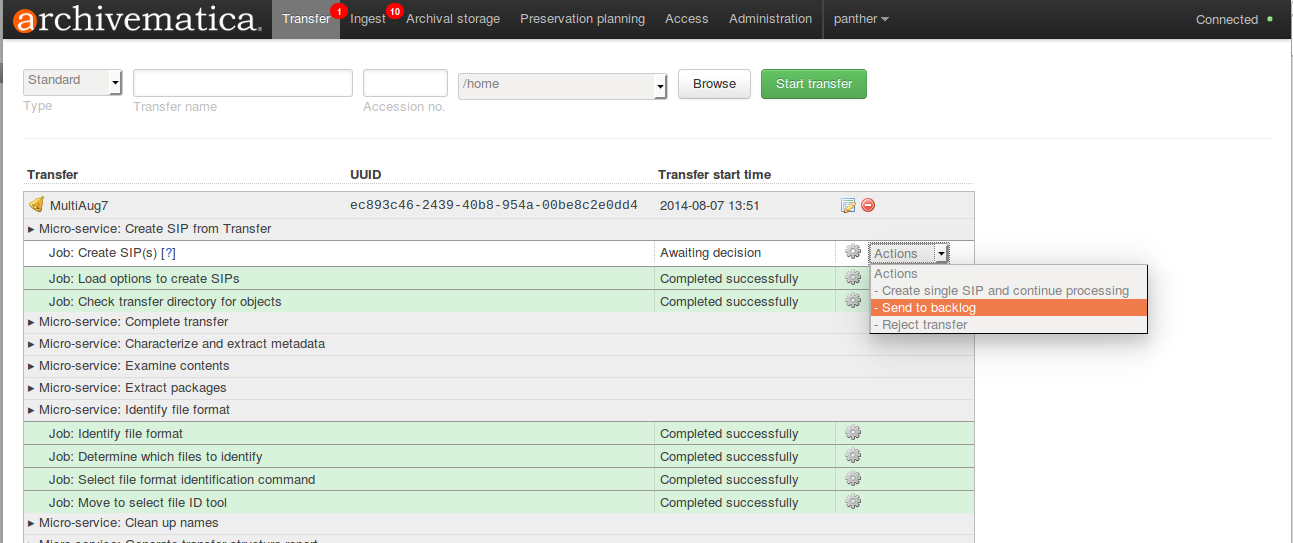
A transfer that is ready to be packaged into a SIP or stored in backlog
- Option 1: Select “Create single SIP and continue processing”
- Option 2: Select “Send transfer to backlog”. In this case, your transfer will be stored in a backlog in the same location as your AIP store so that you can retrieve one or more transfers from the Ingest tab for processing at a later date. See Managing a backlog.
- Option 3: Select “Reject the transfer”.
- See Ingest to continue processing the SIP.
Note
At any point during processing, you can click to expand micro-services and view the various jobs. To see the tool output of a job, click on the gear icon. The output will open in a new tab, and the transfer will continue processing.
Create a transfer with submission documentation
You can pre-structure a transfer to denote which files are the digital objects targetted for preservation and which objects are metadata or submission documentation about those objects. Submission documentation may include donor forms, transfer documentation, etc.
See also
Important
Please do not include submission documentation that has non-standard characters in the filename, as submission documentation names are not sanitized. Any filenames other than plain ASCII names may cause errors in processing.
- Before starting your transfer in Archivematica, create a directory within
your intended transfer directory called
metadata. - Within the
metadatadirectory, create another directory calledsubmissionDocumentation(must be in camel-case, exactly as shown). Example directory structure:
   /transferDirectoryExample
      file1.jpg
      file2.jpg
      etc.
         /metadata
            /submissionDocumentation
               donor-file.txt
               etc.

The top level directory can also contain subdirectories if you wish.
- Start your transfer in Archivematica as described above.
Note
In previous versions of Archivematica, it was necessary to create an
objects directory for the digital objects which are the preservation
target. This is now optional. Archivematica will automatically create
an objects directory if one does not already exist.
This workflow can be combined with other pre-structured transfer workflows, such as Manual normalization and Digitized output.
Create a transfer with existing checksums
You can include checksums with your transfer if you have them. Archivematica will verify .md5, .sha1 and .sha256 checksums in the Verify checksums micro- service during the Transfer workflow in the dashboard.
- Create a directory called
metadatawithin your transfer directory. - Place the checksum file within the metadata directory. Your checksums should be contained in a single text file named in the following way: checksum.md5, checksum.sha1 or checksum.sha256.
- Begin your standard transfer in the Archivematica dashboard interface.
- If your checksum check fails, this micro-service will show an error. The
micro-service line will turn red. The log for this is sent to the
/logsfolder of the transfer.
Format identification
Archivematica’s default is to allow the user to choose identification options to base normalization actions upon during transfer and then use those results to base normalization upon in ingest. However, you can set your preconfiguration options to allow for the opposite (skip at transfer and identify before normalization) or for both transfer and ingest to allow for user choice in the dashboard.
Artefactual included the ability to skip identification at transfer and/or to change identification tool before normalization mainly to allow for the possibility that content in the transfer backlog may contain formats for which there are not currently entries in the Format Policy Registry (FPR). While the transfers are in the backlog, you can add rules that allow for the format(s) not identified or identifiable at time of transfer to the FPR so that, when they are processed through ingest, all formats will be identified and normalization attempted based on those identifications.
There may be other use case scenarios in the future that this configuration flexibility facilitates. In general, we aim to include as much flexibility as possible when it comes to workflow choices so that the archivist is as central as possible to AIP and DIP processing rather than hardcoding and automating so much that the archivist is left less influence on ingest.
Format identification is logged as a PREMIS event in the METS.xml using the results of running whichever tool chosen during processing.
Extract packages
If you adjust your processing configuration settings, Archivematica will stop after format identification and allow you to extract any packages in your transfer. Additionally, you can decide whether you would like to keep the package with the extracted objects or not.
Archivematica 1.4
Contents
Search
Open the general index or type your search in the search box.
Available projects
Archivematica
- Version 1.16.0 (stable-current)
- Version 1.15.1 (stable-previous)
- Version 1.14.1 (legacy)
- Version 1.13.2 (legacy)
- Version 1.12.2 (legacy)
- Version 1.11.2 (legacy)
- Version 1.10.2 (legacy)
- Version 1.9.3 (legacy)
- Version 1.8.1 (legacy)
- Version 1.7.2 (legacy)
- Version 1.6.1 (legacy)
- Version 1.5 (legacy)
- Version 1.4 (legacy)
Archivematica Storage Service
- Version 0.22.0 (stable-current)
- Version 0.21.1 (stable-previous)
- Version 0.20.1 (legacy)
- Version 0.19.0 (legacy)
- Version 0.18.1 (legacy)
- Version 0.17.1 (legacy)
- Version 0.16.1 (legacy)
- Version 0.15.1 (legacy)
- Version 0.14.1 (legacy)
- Version 0.13.0 (legacy)
- Version 0.12.0 (legacy)
- Version 0.11.1 (legacy)
- Version 0.10 (legacy)
- Version 0.9 (legacy)
- Version 0.8 (legacy)
License
Archivematica documentation by Artefactual Systems Inc. is licensed under a Creative Commons Attribution-ShareAlike 4.0 International License.
