Forensic disk images
Archivematica supports the preservation of forensic disk images. Selecting the disk image transfer type is not required to preserve disk images - you can use the standard transfer types or the bag transfer types, if your disk image is bagged. The disk image transfer type gives users an extra disk image-specific metadata form where you can record information about the imaging process.
On this page
Workflow configuration options
If you are processing disk images, you may want to adjust Archivematica’s processing configuration options in the Administration tab of the dashboard.
For more information on the processing configuration fields, see Fields and options.
Extract packages
Archivematica can be configured to extract the contents from a package, which includes forensic image formats as well as compressed content like ZIP files.
However, extracting the contents of a forensic disk image can cause major performance issues, since disk images often contain many thousands of system files that need to be subsequently processed in Archivematica. This can result in failures. We recommend not extracting forensic image formats. This can be set in the processing configuration by setting the Extract packages job to «No».
If you would like to extract forensic image formats anyway, you can set the Extract packages job to «Yes». We recommend testing this at scale to ensure that it is a viable workflow for your deployment. One scalability option that can help to mitigate the processing load caused by extraction is turning off FITS, which is the default characterization tool that will run on every extracted file. For more information, see Preservation Action Rules on the Scalability page.
Delete packages after extraction
If you have chosen to extract files, Archivematica can be configured to delete the original package (the metadata and logs for the package are retained). This can save space in the resulting AIP. The original package can also be retained.
To have Archivematica automatically delete forensic image formats once the files have been extracted, set the Delete packages after extraction job to «Yes». If you would prefer to retain the file after extraction, set the job to «No».
Examine contents
The examine contents microservice runs Bulk Extractor, a forensics tool that can recognize credit card numbers, social security numbers, and other patterns in data. Bulk Extractor creates logs that are stored in the AIP. The logs can be inspected by sending the transfer to the backlog and using the Examine Contents functionality on the Analysis pane in the Appraisal tab.
Examine contents is another microservice that can result in increased processing time, especially if it is running on the contents of an extracted forensic disk image. If you are not extracting contents, the disk image itself is not likely to generate any results from Bulk Extractor.
We recommend setting the Examine contents job to «No», so that Bulk Extractor does not run. If you would like to run Bulk Extractor on the extracted contents of a forensic disk image, we strongly recommend testing this workflow at scale to ensure that the Archivematica site is properly resourced to handle the processing load.
Using the disk image transfer type
Select Disk image from the Transfer type drop-down menu on the Transfer tab of the dashboard. Give your transfer a name.
From the transfer browser, choose your forensic disk image and click Add. Note that it must be contained within a directory.
If you would like to add metadata about the imaging process, click on the metadata icon to the right of the filename. This will open the metadata form in a new tab. Adding metadata is optional.

Click on the metadata icon to add metadata.
Enter your metadata and click Save, then close the tab.
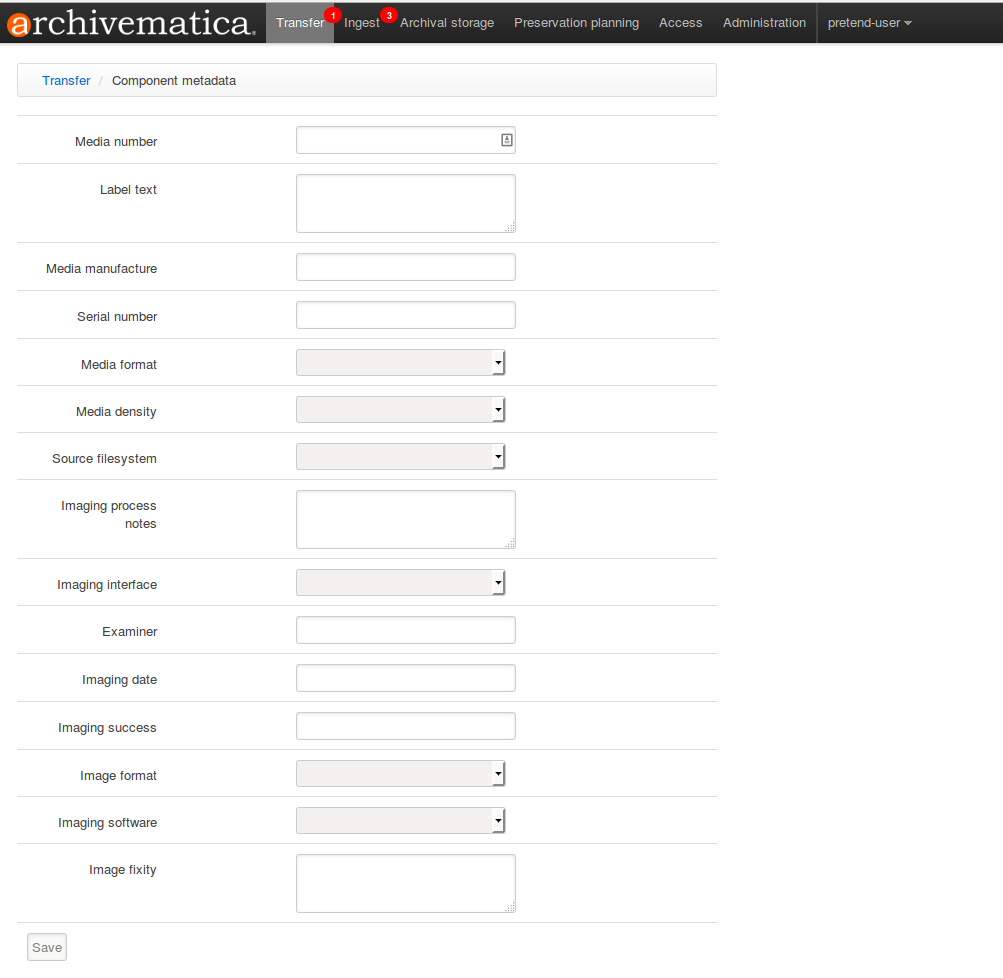
Fill in the metadata template and click save.
Importante
The metadata form opens in a new tab. After clicking save, you must close the new tab to go back to your in-progress transfer, rather than clicking on the Transfer tab from the metadata form.
If you are planning to start multiple transfers, you can repeat the above steps for adding metadata to additional transfers.
Once all images are loaded to the dashboard and all metadata is added, select Start Transfer.
Nota
Note that during the Characterize and extract metadata microservice, fiwalk will be used on forensic disk image files.
Compound disk images
You can combine multiple parts of a compound disk image into a single AIP, if desired, by using the backlog arrangement functionality in Archivematica.
- Start each part of the compound disk image as a single transfer, as per the instructions above.
- When you reach the Create SIP job, select «Send to backlog». Do this for each transfer.
- In the Appraisal tab, use the Arrangement pane to combine your transfers into one SIP.
- Once you’re happy with the arrangement, start the SIP by selecting the parent directory and then clicking Create SIP.
Archivematica 1.12.2
Contenidos
Buscar
Abrir el índice general o introduce una búsqueda en el campo de búsqueda.
Proyectos disponibles
Archivematica
- Version 1.18.0 (stable-current)
- Version 1.17.1 (stable-previous)
- Version 1.16.0 (legacy)
- Version 1.15.1 (legacy)
- Version 1.14.1 (legacy)
- Version 1.13.2 (legacy)
- Version 1.12.2 (legacy)
- Version 1.11.2 (legacy)
- Version 1.10.2 (legacy)
- Version 1.9.3 (legacy)
- Version 1.8.1 (legacy)
- Version 1.7.2 (legacy)
- Version 1.6.1 (legacy)
- Version 1.5 (legacy)
- Version 1.4 (legacy)
Archivematica Storage Service
- Version 0.24.0 (stable-current)
- Version 0.23.0 (stable-previous)
- Version 0.22.0 (legacy)
- Version 0.21.1 (legacy)
- Version 0.20.1 (legacy)
- Version 0.19.0 (legacy)
- Version 0.18.1 (legacy)
- Version 0.17.1 (legacy)
- Version 0.16.1 (legacy)
- Version 0.15.1 (legacy)
- Version 0.14.1 (legacy)
- Version 0.13.0 (legacy)
- Version 0.12.0 (legacy)
- Version 0.11.1 (legacy)
- Version 0.10 (legacy)
- Version 0.9 (legacy)
- Version 0.8 (legacy)
Licencia
Archivematica documentation by Artefactual Systems Inc. is licensed under a Creative Commons Attribution-ShareAlike 4.0 International License.
