Forensic images
Workflow
Preconfigured workflow choices
If you are processing disk images, you will want to adjust the Archivematica default configuration options in the Administration tab of the dashboard for some decision points in the workflow. Archivematica default is to extract content from any packages, which includes forensic image formats as well as compressed content like zip files, and to then delete the package itself (though the metadata and logs for the package are retained in the metadata and logs). To make these decisions in the dashboard processing workflow:
- Deselect ‘Extract packages’ - If you find you are selecting YES or NO most of the time, you can preconfigure this choice accordingly to YES or NO in the administration tab of the dashboard instead.
- Deselect ‘Examine contents’ - If you find you are selecting YES or NO most of the time, you can preconfigure this choice accordingly to YES or NO in the administration tab of the dashboard instead.
- Deselect ‘Delete packages after extraction’ - If you find you are selecting YES or NO most of the time, you can preconfigure this choice accordingly to YES or NO in the administration tab of the dashboard instead.
See also
Upload image to dashboard
1. Select Disk Image type from the drown-down menu on the Transfer tab of the dashboard.
2. Add metadata from the imaging process if desired by clicking on the report button.
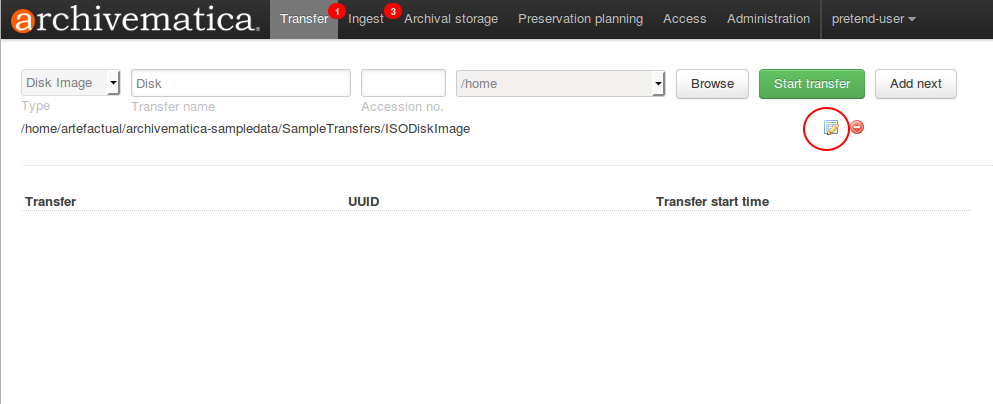
Click on the report button to add metadata
Enter your metadata and click save before navigating back to the Transfer tab.
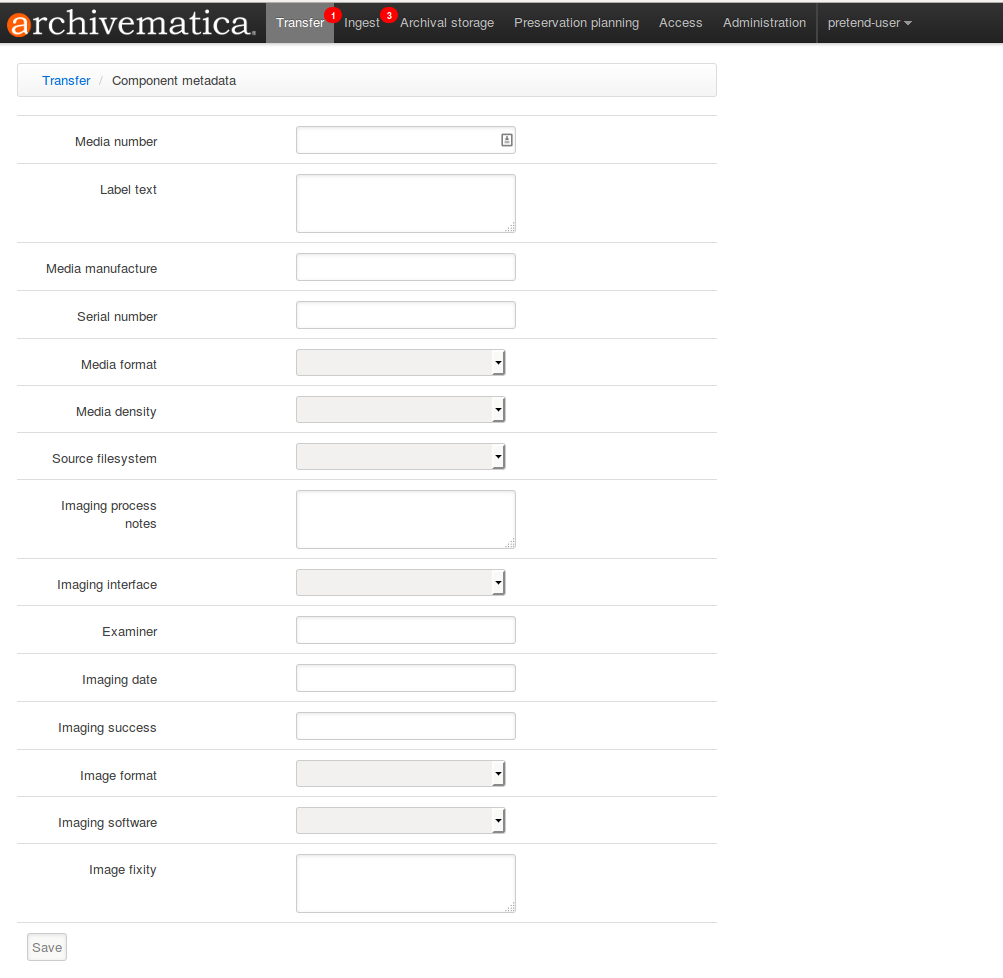
Fill in the metadata template and click save. Then navigate back to Transfer to continue.
You may begin entering metadata for the next image loading to the dashboard by clicking on the Add Next button to the right of Start Transfer.
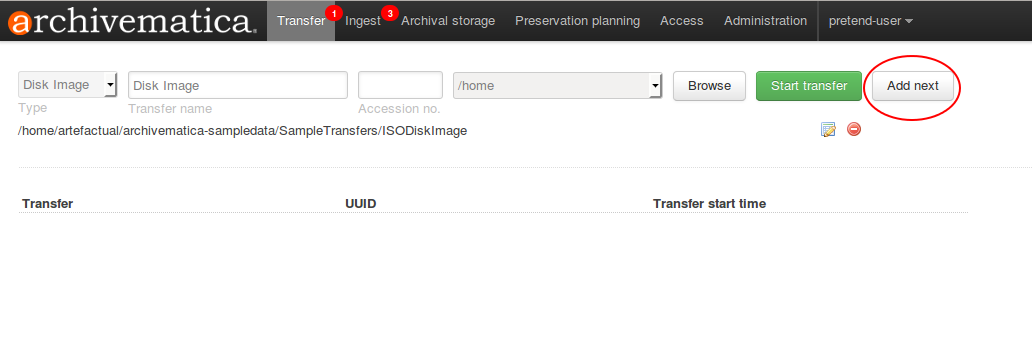
Add the metadata for the next image by clicking Add Next
After an image is loaded, you can add or edit that metadata using the icon next to the loaded image below the transfer upload form. If you are loading multiple images at once, the Add Next button will apply to the next current upload. This metadata is included as another dmdsec in the transfer METS.xml.
3. Once all images are loaded to the dashboard and all metadata is added, select Start Transfer.
4. Continue though regular Transfer workflow. We recommend selecting FIDO for format identification as some images from Kryoflux and raw disk images can have generic extensions. You can preconfigure Archivematica to choose FIDO for identification in the Administration tab of the dashboard when you are signed in as a administrative user.
5. At the Extract packages micro-service, you can choose YES to extract content objects from the image. You can choose NO if you would like to continue processing the image itself without extract its content for automated analysis. Format policy rules for extraction are set using the Format Policy Registry in the Preservation Planning tab of the dashboard.
- If you choose YES, Archivematica will also ask you if you’d like to delete the package itself once extraction of its contents is complete. Here, you can choose YES or NO.
During this workflow, some deviations from standard micro-service behaviors occur:
1. The Characterize and extract metadata micro-service runs a tool called fiwalk on digital forensic images.
2. The Examine contents micro-service allows you to choose whether you would like to run a tool called bulk extractor, which identifies and outputs text reports about PII information contained in the set of objects. These reports can be analyzed later using other tools such as BitCurator. In Archivematica, the reports are contained in the logs folder of the transfer, and later the logs folder for each SIP that all or part of the transfer is contained within.
Note
This micro-service can be run effectively on ALL transfer types, they do not have to be digital forensic disk images.
For simple image transfers, continue directly into the Ingest workflow and finish processing using the standard Archivematica processing instructions.
For compound images, send each transfer part to the Transfer backlog at the end of the transfer workflow. Then, create your SIP from the parts using the transfer backlog search functionality combined with the SIP arrange workflow. Once you’ve selected your SIP and entered the Ingest workflow, finish processing using the standard Archivematica processing instructions.
Archivematica 1.4
Pesquisa
Abra o índice geral digite sua pesquisa na caixa de busca.
Projetos disponíveis
Archivematica
- Version 1.18.0 (stable-current)
- Version 1.17.1 (stable-previous)
- Version 1.16.0 (legacy)
- Version 1.15.1 (legacy)
- Version 1.14.1 (legacy)
- Version 1.13.2 (legacy)
- Version 1.12.2 (legacy)
- Version 1.11.2 (legacy)
- Version 1.10.2 (legacy)
- Version 1.9.3 (legacy)
- Version 1.8.1 (legacy)
- Version 1.7.2 (legacy)
- Version 1.6.1 (legacy)
- Version 1.5 (legacy)
- Version 1.4 (legacy)
Archivematica Storage Service
- Version 0.24.0 (stable-current)
- Version 0.23.0 (stable-previous)
- Version 0.22.0 (legacy)
- Version 0.21.1 (legacy)
- Version 0.20.1 (legacy)
- Version 0.19.0 (legacy)
- Version 0.18.1 (legacy)
- Version 0.17.1 (legacy)
- Version 0.16.1 (legacy)
- Version 0.15.1 (legacy)
- Version 0.14.1 (legacy)
- Version 0.13.0 (legacy)
- Version 0.12.0 (legacy)
- Version 0.11.1 (legacy)
- Version 0.10 (legacy)
- Version 0.9 (legacy)
- Version 0.8 (legacy)
Licença
Archivematica documentation by Artefactual Systems Inc. is licensed under a Creative Commons Attribution-ShareAlike 4.0 International License.
